
Art Project - Pumpkin Stack
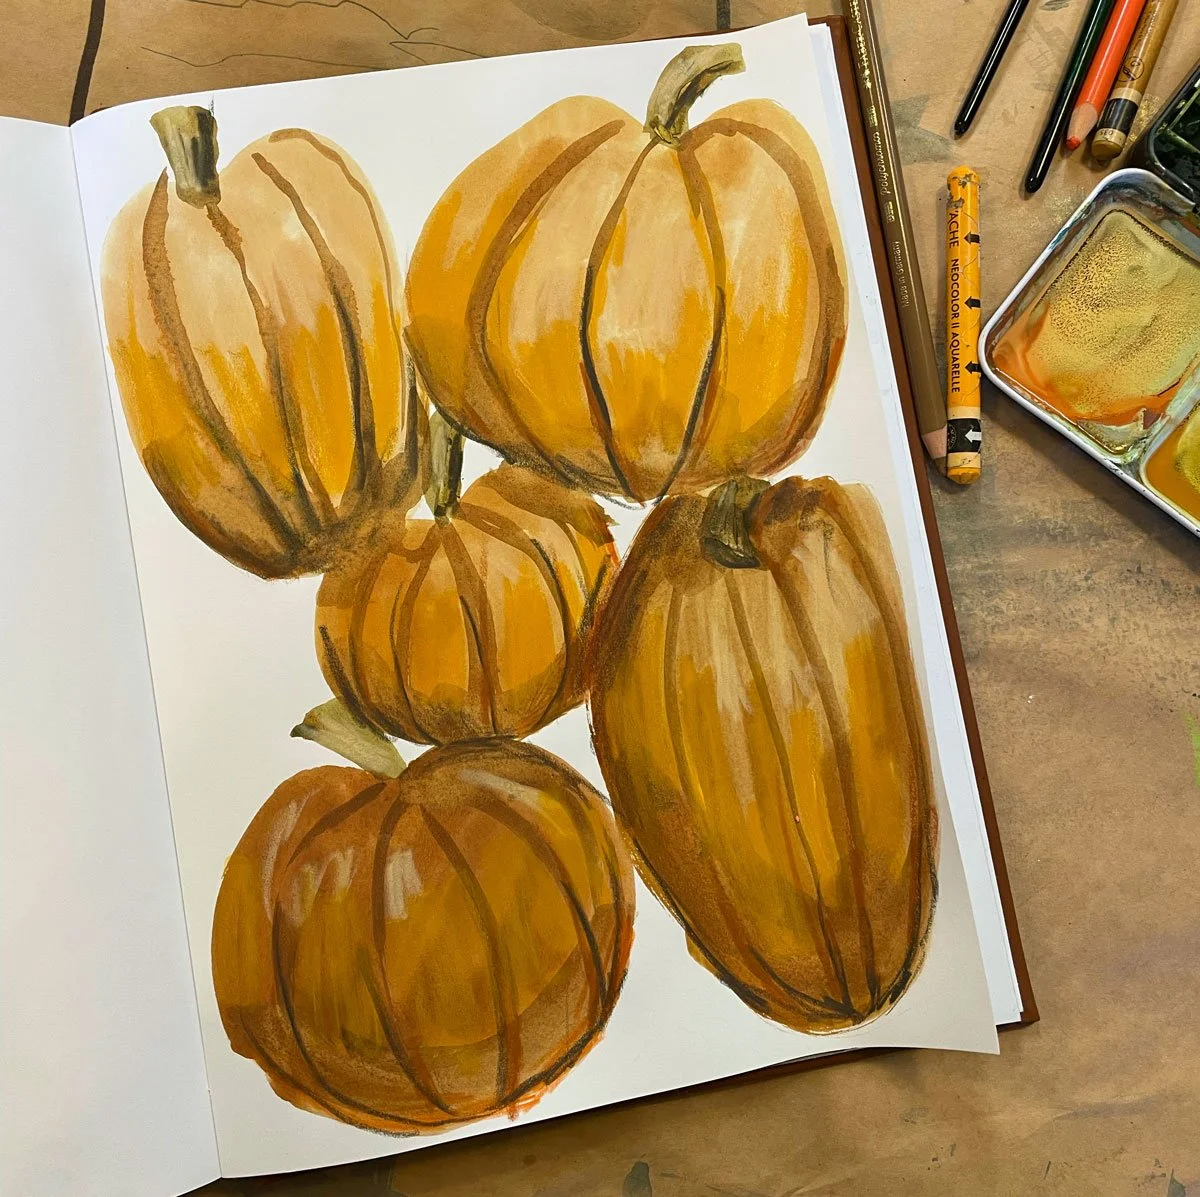
This art project will have 2 parts. We’re going to start with the Pumpkin Stack and then get to the Jack-O-Lantern Stack in a couple weeks…for obvious reasons. I created a video of my process in stories format so you’ll have to go to Youtube to watch or you can use my reference and find your own way to the end. I didn’t know what my steps were going to be as I started working, I just knew I wanted to work quickly and I wanted to try and add a bit of shading.
The Goal:
To work on getting loose and working on shading.
The Materials:
Watercolour paint and colour pencils…use what you have.
The Process:
Start by painting your pumpkin shapes in a light orange colour. Starting light will allow you to get darker in your layers.
With a brighter orange, paint in your quick shading and pumpkin lines.
Continue to go darker and darker in your layers and add shadow where the pumpkins meet. I kept my darker colours to the bottom of the pumpkins.
Add some highlights, if you can, to give it a bit of reflecting light.
Share your art with Brina!
How you finish this art project will be completely yours, even if you do exactly what I did, and that’s something to celebrate. Share your art with me on Instagram and I’ll share with my friends! This is Hester Hamilton’s Mushroom house.
If you’re interested in more, join Brina’s Creative Side. Becoming a member gives you access to all of the previous and upcoming posts which include printables, more photos, detailed instructions, videos, and customizable options for each art project. Perfect for teachers, art instructors, parents, or any one of any age who might want a bit of creative inspiration.